A Machinist's Hammer: Part 1 - Sketch
The glint of steel, the satisfying thud of impact, the feel of a well-balanced tool in hand - these are the sensations that resonate with anyone who appreciates the craft of making. From shaping raw materials to assembling intricate mechanisms, the skilled hands of a machinist are indispensable. And at the heart of their arsenal lies a humble yet essential instrument: the machinist's hammer.
More than just a striking tool, the machinist's hammer is an extension of the artisan's intent. It's a precision instrument used for delicate adjustments, controlled blows, and the meticulous shaping of metal. Its design, seemingly simple, is a testament to functionality and enduring craftsmanship. Every curve, every facet, serves a purpose, contributing to its effectiveness and the comfort of the user.
Think about the complex dance between tool and material. The hammer guides the chisel, coaxes the metal into submission, and helps bring the machinist's vision to life. It's a partner in the creative process, a silent collaborator that amplifies the worker's skill and precision. A poor hammer is a chore to use, an accurate and properly weighted hammer is an extension of the mind.
But how does this essential tool come to be? What are the considerations that go into its design and manufacture? The journey begins not on the shop floor, but at the drawing board, with the careful creation of a sketch. This initial step is crucial, laying the foundation for a tool that will withstand the rigors of daily use and deliver reliable performance for years to come. The beginning of every great tool begins with a great plan.
So, let's delve into the world of toolmaking, and specifically, the fascinating process behind crafting a machinist's hammer. Today, we are going to begin with A Machinist's Hammer: Part 1 - Sketch. A crucial first step in any project.
The Importance of the Initial Sketch
Visualizing the Final Product
The sketch is more than just a rough drawing; it's a visual blueprint that guides the entire manufacturing process. It helps the machinist visualize the final product, identifying potential problems and refining the design before any material is even touched. It serves as a reference point, ensuring that everyone involved in the process – from the designer to the manufacturer – is on the same page.
A well-executed sketch captures the essential dimensions, proportions, and features of the hammer. It showcases the shape of the head, the length and curvature of the handle, and the overall balance of the tool. It also incorporates any specific design requirements or user preferences, ensuring that the final product meets the intended needs.
Without a clear and detailed sketch, the manufacturing process can become chaotic and inefficient. Errors can occur, materials can be wasted, and the final product may not meet the required specifications. The sketch, therefore, is an indispensable tool for ensuring quality control and minimizing costly mistakes.
Furthermore, the initial sketch can also serve as a starting point for further refinement and development. It can be used to create more detailed drawings, computer models, and prototypes, allowing the machinist to test and improve the design before committing to mass production. The sketch is an iterative process that evolves and improves the concept.
In essence, the sketch is the foundation upon which the entire project is built. It's the first step towards creating a functional, durable, and aesthetically pleasing tool that will serve the machinist well for years to come. This careful planning stage is crucial for crafting a quality product.
Ensuring Accuracy and Precision
The sketch demands meticulous attention to detail. Every line, every measurement, must be accurate and precise. Even small errors can have a significant impact on the final product, affecting its balance, weight, and overall performance. A slight miscalculation can lead to a poorly balanced tool, and an inaccurate measurement can render the hammer unusable.
To ensure accuracy, the machinist must employ appropriate drafting tools and techniques. This may include using rulers, compasses, protractors, and other specialized instruments to create precise lines and angles. They may also use computer-aided design (CAD) software to create more detailed and accurate drawings.
Furthermore, the machinist must carefully consider the tolerances of each dimension. Tolerances specify the acceptable range of variation for each measurement, ensuring that the final product meets the required specifications. Tight tolerances require greater precision and care during the manufacturing process.
The sketch should also include clear annotations and notes, specifying the materials to be used, the desired surface finish, and any other relevant information. This helps to ensure that the manufacturer understands the design requirements and can produce a product that meets the intended specifications.
By paying close attention to detail and ensuring accuracy at the sketch stage, the machinist can minimize the risk of errors and create a high-quality product that meets the exacting standards of the profession. Accuracy in the plan leads to accuracy in the finished product.
Key Elements of a Machinist's Hammer Sketch
The Hammer Head: Shape and Weight
The hammer head is arguably the most critical element of the design, and its shape and weight are crucial considerations. The shape determines the type of work the hammer is best suited for, while the weight affects the force of the impact and the overall balance of the tool.
Common hammer head shapes include ball peen, cross peen, and straight peen. A ball peen hammer features a rounded end that is used for shaping metal, while a cross peen hammer has a wedge-shaped end that is used for riveting and spreading metal. A straight peen hammer has a narrow, rectangular end that is used for bending and straightening metal.
The weight of the hammer head also plays a significant role in its performance. A heavier hammer delivers a more powerful impact, while a lighter hammer is easier to control and maneuver. The ideal weight depends on the type of work being performed and the user's preferences.
The sketch should clearly depict the shape and dimensions of the hammer head, as well as its weight. This information is essential for the manufacturer to produce a hammer head that meets the required specifications. It may also include details about the material to be used, such as the type of steel or other alloy.
Careful consideration of the hammer head's shape and weight is crucial for creating a tool that is both effective and comfortable to use. The sketch helps to ensure that these critical elements are properly addressed.
The Handle: Length, Material, and Grip
The handle is another essential element of the design, affecting the comfort, control, and overall performance of the hammer. The length of the handle determines the leverage and swing arc, while the material and grip affect the user's ability to hold and control the tool.
A longer handle provides greater leverage and allows for a more powerful swing, while a shorter handle is easier to control in tight spaces. The ideal handle length depends on the type of work being performed and the user's preferences.
Common handle materials include wood, fiberglass, and steel. Wood handles are traditional and offer a comfortable grip, while fiberglass handles are more durable and resistant to moisture and chemicals. Steel handles are the most durable but can be less comfortable to use.
The grip is another important consideration, as it affects the user's ability to hold and control the hammer. Common grip designs include smooth, textured, and contoured grips. A textured or contoured grip provides a better hold and reduces the risk of slippage.
The sketch should clearly depict the length, material, and grip of the handle. This information is essential for the manufacturer to produce a handle that is both comfortable and functional. The handle shape should also be clearly defined.
Overall Dimensions and Balance
The overall dimensions and balance of the hammer are crucial for its performance and usability. A well-balanced hammer is easier to control and reduces fatigue, while a poorly balanced hammer can be difficult to use and may even lead to injury.
The overall length of the hammer, including the head and handle, should be clearly indicated on the sketch. This helps to ensure that the hammer is the correct size for the intended application. The dimensions are critical in determining leverage and efficiency.
The balance point of the hammer should also be indicated on the sketch. This is the point at which the hammer will balance evenly when held in the hand. A well-balanced hammer will have its balance point close to the head, which makes it easier to control and swing.
The sketch should also include information about the overall weight of the hammer. This helps to ensure that the hammer is neither too heavy nor too light for the intended application. The weight contributes directly to impact force.
By carefully considering the overall dimensions and balance of the hammer, the machinist can create a tool that is both effective and comfortable to use. The sketch helps to ensure that these critical elements are properly addressed.
Tools and Techniques for Sketching
Traditional Drafting Tools
While CAD software is widely used in modern engineering and design, traditional drafting tools still hold a place in the creation of sketches, especially in the initial conceptual stages. These tools offer a tactile connection to the design process and allow for quick and intuitive exploration of ideas. The simple connection can bring about great design.
Essential drafting tools include pencils of varying hardness, rulers, compasses, protractors, and French curves. Pencils of different hardness allow for varying line weights and shading, while rulers provide accurate straight lines. Compasses are used for drawing circles and arcs, protractors for measuring angles, and French curves for creating smooth, flowing curves.
The use of traditional drafting tools requires a certain level of skill and practice. The machinist must be able to accurately measure and draw lines, angles, and curves, and must also be able to create clear and legible sketches. This knowledge helps to create the base plan.
Despite the rise of digital tools, many machinists still prefer to start with a hand-drawn sketch, as it allows for greater freedom and flexibility in the early stages of the design process. The ability to quickly sketch out ideas on paper can be invaluable for brainstorming and exploring different design options.
Traditional drafting tools provide a tangible and intuitive way to bring design ideas to life. They are a valuable asset in the machinist's toolkit, even in the age of digital design.
CAD Software and Digital Sketching
Computer-aided design (CAD) software has revolutionized the engineering and design process, offering powerful tools for creating accurate and detailed drawings. CAD software allows machinists to create 2D and 3D models of the hammer, visualize its appearance, and simulate its performance.
CAD software offers several advantages over traditional drafting tools. It allows for greater precision and accuracy, and it makes it easier to modify and revise the design. CAD software also allows for the creation of complex geometries and intricate details that would be difficult to achieve with traditional methods.
There are many different CAD software packages available, ranging from free and open-source programs to expensive and professional-grade suites. The choice of software depends on the machinist's budget, skill level, and specific needs. It is crucial to understand the software before using it.
In addition to creating detailed drawings, CAD software can also be used for creating photorealistic renderings of the hammer. These renderings can be used for marketing and sales purposes, or for visualizing the hammer in different environments.
CAD software is an essential tool for modern machinists, offering powerful capabilities for creating accurate, detailed, and visually appealing designs. It is an incredible step up from traditional design methods.
Tips for Creating Effective Sketches
Creating an effective sketch requires more than just technical skill; it also requires careful planning and attention to detail. Here are some tips for creating sketches that are clear, accurate, and informative:
- Start with a rough outline: Begin by sketching out the basic shape and proportions of the hammer. This will help you to establish the overall layout and ensure that the sketch is well-balanced.
- Use clear and concise lines: Avoid using excessive shading or detail, as this can make the sketch difficult to read. Instead, focus on creating clean, crisp lines that clearly define the shape of the hammer.
- Label all dimensions and features: Clearly label all dimensions, angles, and features of the hammer. This will help to ensure that the manufacturer understands the design requirements.
- Use appropriate scale: Choose a scale that allows you to accurately represent the size and proportions of the hammer. A larger scale will allow for greater detail, while a smaller scale will be more convenient for overall layout.
- Review and revise your sketch: Before submitting your sketch, take the time to review it carefully for errors and omissions. Make any necessary revisions to ensure that the sketch is clear, accurate, and complete.
By following these tips, you can create effective sketches that will guide the manufacturing process and ensure that the final product meets your expectations. A well-executed plan makes execution all the better.
Material Considerations in the Sketch
Choosing the Right Steel for the Head
The choice of steel for the hammer head is paramount to its durability, hardness, and overall performance. Different types of steel possess varying properties, making some more suitable for specific applications than others. The ideal steel for a machinist's hammer head should be able to withstand repeated impacts without deforming or fracturing.
High-carbon steel is a common choice for hammer heads due to its hardness and ability to be heat-treated. Heat treatment processes, such as hardening and tempering, can further enhance the steel's strength and toughness. The heat treatment is what makes the steel so durable and useful.
Alloy steels, which contain additional elements like chromium, vanadium, or molybdenum, can also be used to improve the steel's properties. These elements can enhance the steel's resistance to wear, corrosion, and fatigue. The different alloys lead to specialized properties.
The sketch should clearly specify the type of steel to be used for the hammer head, as well as any required heat treatment processes. This information is essential for the manufacturer to produce a hammer head that meets the required specifications. The sketch becomes the roadmap for creation.
By carefully selecting the right steel for the hammer head, the machinist can ensure that the tool is durable, reliable, and capable of withstanding the rigors of daily use. Durability is key to a long lasting tool.
Selecting the Appropriate Handle Material
The handle material plays a crucial role in the hammer's comfort, grip, and overall durability. Common handle materials include wood, fiberglass, and steel, each offering its own unique set of advantages and disadvantages. The selection of handle material will greatly impact the user experience.
Wood handles, typically made from hickory or ash, are known for their comfortable grip and shock-absorbing properties. However, wood handles are susceptible to moisture damage, cracking, and splintering. Regular maintenance and care are required to keep wood handles in good condition. Care helps with the longevity of the tool.
Fiberglass handles offer greater durability and resistance to moisture and chemicals than wood handles. Fiberglass handles are also less likely to crack or splinter, making them a safer and more reliable option. This is a popular choice for modern hammers.
Steel handles are the most durable option, but they can be less comfortable to use than wood or fiberglass handles. Steel handles also transmit more vibration to the user's hand, which can lead to fatigue over time. The sketch must clearly specify the type of handle material to be used.
The choice of handle material should be based on a careful consideration of the user's needs and preferences. The sketch serves as a guide for the handle choice.
Surface Finish and Coatings
The surface finish and coatings applied to the hammer can significantly impact its appearance, durability, and resistance to corrosion. A well-executed surface finish can enhance the tool's aesthetics and protect it from the elements.
Common surface finishes for hammer heads include polishing, sandblasting, and painting. Polishing provides a smooth and reflective surface, while sandblasting creates a textured and matte finish. Painting can add color and protect the steel from corrosion. This also leads to personalization of tools.
Coatings, such as powder coating or plating, can provide additional protection against corrosion and wear. Powder coating is a durable and long-lasting finish that is resistant to chipping and scratching. Plating, such as chrome plating, can add a bright and shiny finish while also providing corrosion resistance. The sketch may contain details on surface coatings.
The handle can also be treated with various finishes, such as varnish or lacquer, to protect it from moisture and wear. These finishes can also enhance the grip and comfort of the handle. Protecting the hammer increases its usable life.
The sketch should clearly specify the desired surface finish and coatings for both the hammer head and the handle. This information is essential for achieving the desired look and performance. It is very important to have details regarding coatings.
Refining the Sketch: Iteration and Feedback
Seeking Input from Experienced Machinists
Once the initial sketch is complete, it's essential to seek input from experienced machinists. These skilled professionals can provide valuable feedback on the design, identifying potential problems and suggesting improvements. Their practical experience and knowledge of machining processes can help to ensure that the final product is both functional and manufacturable. Feedback improves the design.
Experienced machinists can assess the sketch for potential manufacturing challenges, such as difficult-to-machine features or tight tolerances that may be difficult to achieve. They can also offer advice on the selection of appropriate materials and manufacturing processes. Experienced machinists also add their insight.
It's important to be open to feedback and willing to make changes to the sketch based on the input received. The goal is to create the best possible design, and constructive criticism is essential for achieving that goal. Listen to the advice of experts.
The feedback process should be collaborative and iterative. The machinist should engage in open communication with the experienced machinists, discussing the design rationale and addressing any concerns or questions. Collaboration makes the design even better.
By seeking input from experienced machinists, the designer can refine the sketch and create a tool that is both functional and manufacturable. Their expertise is invaluable in the design process.
Incorporating Design Changes and Improvements
Based on the feedback received, the sketch should be revised and improved. This may involve making changes to the shape of the hammer head, the length or material of the handle, or the overall dimensions and balance of the tool. Changes ensure the plan is the best one possible.
It's important to document all design changes and keep track of the rationale behind them. This will help to ensure that the final product meets the required specifications and that any future modifications are well-informed. Careful notes keep track of the design process.
The design process should be iterative, with multiple rounds of feedback and revisions. Each iteration should bring the design closer to the ideal solution. The goal is to constantly improve the design.
The sketch should be updated to reflect all design changes. This will ensure that the manufacturer has an accurate and up-to-date blueprint to work from. Maintaining accurate plans prevents errors in the finished product.
By incorporating design changes and improvements, the machinist can create a tool that is both functional and user-friendly. Constant improvement makes the tool perfect.
Creating a Final, Detailed Sketch
Once all feedback has been incorporated and the design has been finalized, a detailed sketch should be created. This sketch should include all dimensions, tolerances, and material specifications. The detail is crucial for the manufacturing process.
The final sketch should be clear, accurate, and easy to understand. It should serve as a comprehensive guide for the manufacturer. Clarity prevents manufacturing issues.
The sketch should be reviewed and approved by all stakeholders before it is released for manufacturing. This will ensure that everyone is on the same page and that any remaining issues are addressed. Final approval is crucial for all involved.
The final sketch should be archived for future reference. This will allow for easy retrieval of the design in case of future repairs or modifications. Archiving documents the design for years to come.
By creating a final, detailed sketch, the machinist can ensure that the manufacturing process proceeds smoothly and that the final product meets all expectations. The sketch is a roadmap to success.
Beyond the Sketch: From Plan to Prototype
Creating a Prototype for Testing
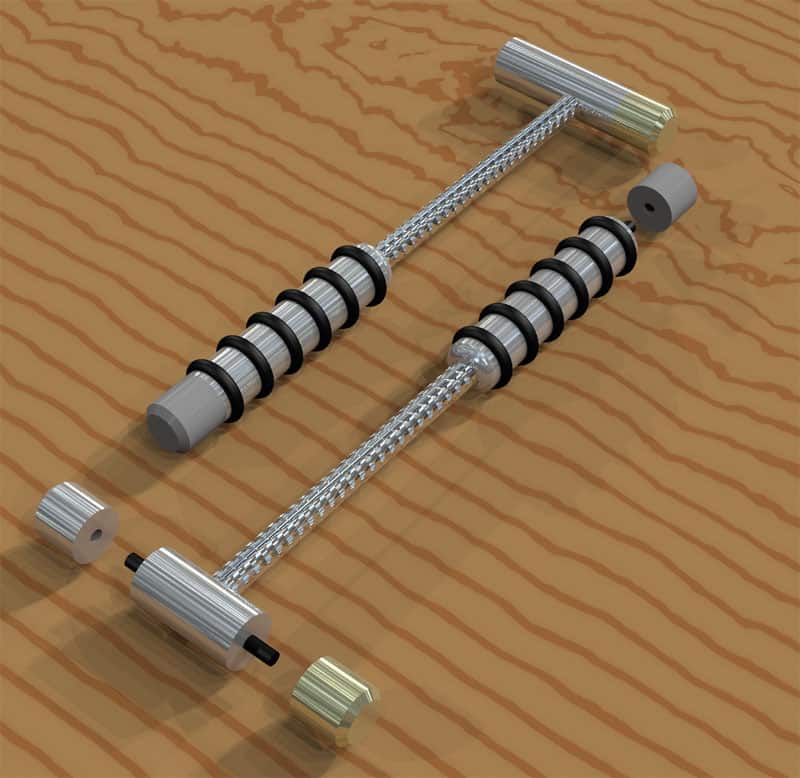
With a finalized sketch in hand, the next step is often the creation of a prototype. A prototype allows for a tangible assessment of the design, revealing any unforeseen issues or areas for improvement that may not have been apparent on paper. This is a chance to test how the tool feels and performs.
The prototype doesn't necessarily need to be made from the final intended materials. A less expensive material can be used for the initial prototype, focusing on verifying the dimensions, balance, and overall ergonomics of the design. This can save time and money in the long run.
Testing the prototype involves using it in real-world scenarios, simulating the types of tasks it will be used for in its final form. Feedback from these tests is invaluable for identifying any weaknesses or areas that need further refinement. The testing is very important in determining design choices.
Based on the prototype testing, adjustments can be made to the sketch, and a new prototype can be created. This iterative process continues until the design is fully optimized and meets all performance requirements. Several prototypes may be made.
The prototype stage is a critical bridge between the theoretical plan and the finished product, allowing for practical validation and continuous improvement. The iterative testing process keeps improving the product.
Addressing Potential Manufacturing Challenges
Throughout the sketching and prototyping process, potential manufacturing challenges should be carefully considered. This includes evaluating the feasibility of producing the design with the available equipment and resources. Feasibility is key to realistic design.
Complex shapes or tight tolerances can significantly increase manufacturing costs and lead times. Simplifying the design where possible, without compromising functionality, can improve manufacturability and reduce costs. Reducing complexity reduces cost and time.
It's also important to consider the availability of materials and the expertise of the manufacturing team. Choosing readily available materials and leveraging the team's skills can streamline the production process. Know your teams limitations and strengths.
Early communication with the manufacturing team is crucial for identifying and addressing potential challenges before they become costly problems. Open communication ensures that all parties are on the same page. This includes A Machinist's Hammer: Part 1 - Sketch.
By proactively addressing manufacturing challenges, the designer can create a product that is not only functional and aesthetically pleasing but also cost-effective and easy to produce. Proactive planning leads to a positive result.
The Importance of Continuous Improvement
The process of creating a machinist's hammer, from initial sketch to final product, should be viewed as an ongoing process of continuous improvement. Each iteration of the design, each round of feedback, and each prototype test provides valuable insights that can be used to refine and optimize the tool. Iteration is vital to any design.
Even after the hammer is in production, it's important to continue monitoring its performance and gathering feedback from users. This information can be used to identify potential areas for further improvement. Feedback is key to the creation of a better product.
The pursuit of continuous improvement should be ingrained in the design and manufacturing culture. By constantly striving to make better tools, the machinist can contribute to the advancement of the craft. Constant improvement is always the goal.
The mindset of continuous improvement ensures that the machinist's hammer remains a reliable, effective, and user-friendly tool for generations to come. The future of the tool is up to future machinists.
Ultimately, A Machinist's Hammer: Part 1 - Sketch, is only the beginning. There is still much more to learn about the creation of the tools we use every day.
Conclusion
Creating a machinist's hammer is a journey that begins with a simple sketch, but involves a deep understanding of materials, manufacturing processes, and the needs of the end-user. The sketch is the foundation, the blueprint upon which the entire project is built. From selecting the right steel for the head to choosing the appropriate handle material, every decision is carefully considered to ensure that the final product is both functional and durable. Every choice counts.
The iterative process of seeking feedback, incorporating design changes, and creating prototypes is crucial for refining the design and addressing potential manufacturing challenges. This ensures that the final product meets the highest standards of quality and performance. The dedication to creating quality is vital to all trades.
By embracing a culture of continuous improvement, the machinist can ensure that their tools remain at the forefront of innovation and continue to serve the needs of skilled artisans for generations to come. Continuous improvement always elevates quality.
We hope you have enjoyed this exploration of the making of the machinist's hammer! There is much more to learn and there are lots more articles to come. Tools, materials, and all the things that a machinist deals with on a daily basis.
If you found this article informative, be sure to check out our other articles on toolmaking, machining techniques, and related topics. We are always adding new content to help you expand your knowledge and skills. Keep an eye out for more articles.
- Visualizes the Final Product
- Ensures Accuracy and Precision
- Defines Shape and Weight of the Hammer Head
- Specifies Handle Length, Material, and Grip
- Dictates Overall Dimensions and Balance
- Employs Traditional Drafting Tools or CAD Software
- Selects Appropriate Steel for the Head
- Determines Appropriate Handle Material
- Specifies Surface Finish and Coatings
- Seeks Input from Experienced Machinists
- Incorporates Design Changes and Improvements
- Addresses Potential Manufacturing Challenges
- Tests Prototypes for Validation
- Creates detailed Plan